
How to Remove Background from an Image in Google Slides: The Ultimate Guide
Master the art of background removal in Google Slides with our step-by-step guide. Learn about built-in tools, Gemini AI, and professional alternatives for high-quality results.
Visual storytelling is the backbone of any compelling presentation. Whether you are pitching a new product to investors, creating a classroom lecture, or designing a marketing deck, the quality of your imagery can make or break your message. One of the most common challenges presenters face is dealing with distracting image backgrounds that clash with their slide design.
You’ve likely been there: you find the perfect product photo, but it has a messy office background or a harsh grey shadow that stands out like a sore thumb against your clean Google Slides theme. Knowing how to remove the background from an image in Google Slides isn't just a technical skill—it's a design necessity that elevates your professional credibility.
In this comprehensive guide, we will explore every method available to clean up your images directly within Google Workspace, as well as professional-grade alternatives like SellerCam for those who need pixel-perfect results for e-commerce.

Why Background Removal Matters for Presentations
Before we dive into the "how," let's discuss the "why." A transparent background allows you to layer images, create depth, and maintain brand consistency. When backgrounds are removed, your subject—whether it's a person or a product—becomes the focal point.
| Benefit | Impact on Presentation |
|---|---|
| Visual Hierarchy | Draws the audience's eye directly to the subject without distraction. |
| Design Flexibility | Allows for overlapping elements and creative layering of text and images. |
| Professionalism | Eliminates the 'cluttered' look of mismatched rectangular image frames. |
| Brand Consistency | Ensures all images fit the color palette of your specific slide theme. |
Method 1: Using Google Slides Built-in Image Adjustments
Google Slides does not have a "Magic Wand" tool like Photoshop, but it does offer basic transparency adjustments that can work for simple images, particularly those with solid or very light backgrounds. This is the quickest way to blend an image if you are in a rush.
The Limitations of Manual Adjustments
It is important to manage expectations here. The built-in "Adjustments" slider changes the transparency of the entire image. It doesn't intelligently detect edges. However, for certain design styles, this can be effective.
- Select your image: Click on the image you want to modify.
- Open Format Options: Click "Format options" in the top toolbar or right-click the image.
- Adjust Transparency: Under the "Adjustments" tab, move the transparency slider.
While this doesn't "remove" the background in a traditional sense, it can soften the edges of a white-background photo against a light-colored slide.
Method 2: Using the New Gemini AI Feature
Google has recently integrated Gemini AI into Google Workspace. If you have a Google One AI Premium subscription or a Workspace enterprise account with the Gemini add-on, you have access to a much more powerful removal tool.

How to use Gemini for Background Removal
If your account is eligible, you will see a "Remove Background" button when you select an image.
- Insert Image: Place your photo on the slide.
- Click Remove Background: This button typically appears in the top toolbar when an image is active.
- Refine (Optional): The AI will process the image and attempt to isolate the subject.
This method is significantly faster than manual masking but can sometimes struggle with complex textures like hair or translucent objects like glassware.
Method 3: The "Masking" Workaround with Shapes
If you have a subject with a relatively geometric shape, you can use the "Mask Image" feature to crop the image into a specific shape, effectively hiding the background.
- Select the Image.
- Find the Crop Icon: Look for the crop icon in the toolbar, but click the small arrow next to it.
- Choose a Shape: Select a circle, heart, or rounded rectangle.
- Adjust the Mask: Double-click to move the image within the shape.
This is a "non-destructive" way to remove backgrounds, meaning you can always reset the image later.
When Google Slides Isn't Enough: The Professional Alternative
For e-commerce sellers, marketers, and high-stakes presenters, the "good enough" results from Google Slides often fall short. If you are presenting a product, you need crisp edges, proper lighting, and a truly professional finish.
This is where specialized tools like SellerCam come in. Unlike general-purpose office tools, SellerCam is built specifically for product photography.
Why Professionals Use External Tools
Google Slides' AI is designed for general use. In contrast, SellerCam uses specialized models trained on millions of product images to handle tricky edges and lighting conditions.
| Feature | Google Slides (Gemini) | SellerCam AI |
|---|---|---|
| Edge Detection | Good for simple shapes | Excellent for complex textures (hair, fur, lace) |
| Batch Processing | One by one | Process dozens of images simultaneously |
| Output Quality | Compressed for web | High-resolution for print and web |
| Lighting Correction | Minimal | Professional AI enhancement included |
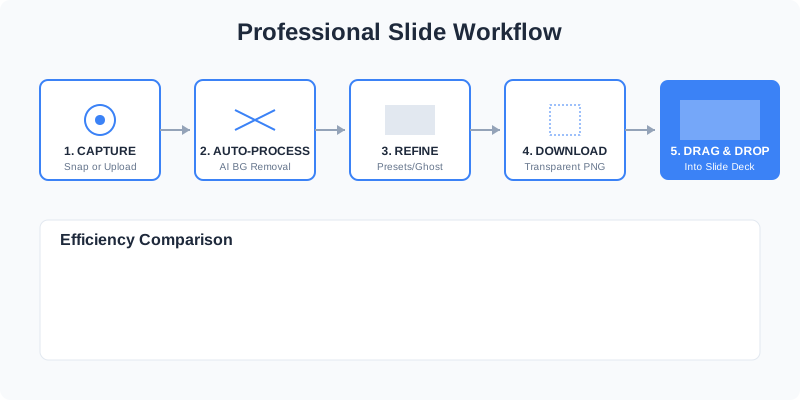
Step-by-Step: The Professional Workflow for Google Slides
If you want the best possible slides, follow this workflow:
- Capture or Upload: Use the SellerCam web app or mobile camera to capture your product.
- AI Processing: Select the "White Background" or "Transparent" preset. The AI will remove the background with surgical precision.
- Enhance: Use the AI enhancement tool to ensure the colors pop and the resolution is sharp.
- Export as PNG: Always download as a PNG file to preserve the transparency.
- Import to Slides: Drag and drop your perfect, transparent image directly into Google Slides.
Advanced Tips for Better Background Removal
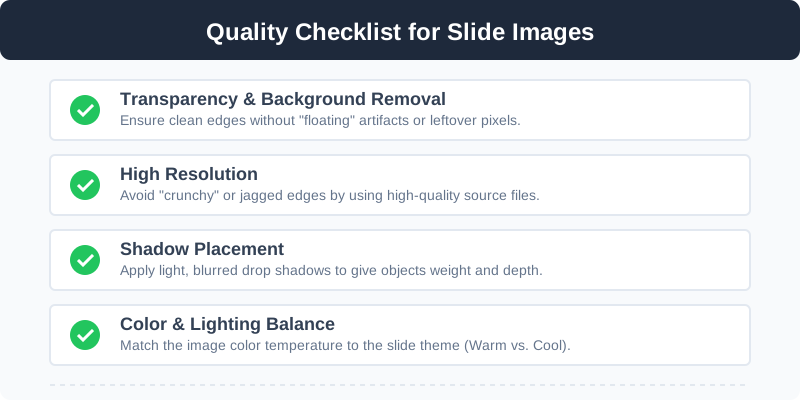
Removing a background is much easier if the original photo is high quality. Even the most advanced AI benefits from a good source file.
1. Contrast is Key
Ensure your subject is a different color than the background. If you're shooting a white product, don't use a white wall. Use a light grey or blue background to help the AI distinguish the edges.
2. Lighting Matters
Soft, even lighting reduces harsh shadows that can confuse background removal algorithms. If you are using your phone, try to shoot near a window during the day.
3. Use "Ghost Mannequin" for Apparel
If you are presenting clothing, a floating "ghost mannequin" look is much more professional than a flat lay. SellerCam offers a specific tool for this effect that works perfectly for fashion presentations.
Comparing Different Background Removal Tools
Not all tools are created equal. Depending on your technical skill and your budget, you might choose different paths.
| Tool Type | Examples | Best For | Effort |
|---|---|---|---|
| Built-in Office | Google Slides, PowerPoint | Quick internal meetings | Low |
| Graphic Design | Canva, Adobe Express | Social media posts | Medium |
| Professional AI | SellerCam | E-commerce, Professional Decks | Low (Auto) |
| Manual Pro | Photoshop, GIMP | Complex composite art | High |
Common Troubleshooting Issues
"My image has a black background after I upload it!" This usually happens if you saved the image as a JPG. JPG files do not support transparency. Ensure you are using PNG or WebP formats when dealing with removed backgrounds.
"The edges look jagged and 'pixelated'." This is a sign of low resolution or poor AI edge detection. If you're using the built-in Google Slides tool, try using a higher-resolution original or switching to a dedicated tool like SellerCam to smooth out those edges.
"I can't find the Gemini AI button." AI features are rolling out gradually. Ensure your Google Workspace language is set to English (US) and that your administrator has enabled "Early Access" features.

Final Thoughts: Elevating Your Presentation
Learning how to remove the background from an image in Google Slides is a foundational step in becoming a better visual communicator. While the built-in tools are improving, they are often just a starting point.
For those who value their time and their brand's image, leveraging professional AI tools is the smartest path forward. A clean, transparent image doesn't just look better—it builds trust with your audience by showing that you care about the details.
Ready to transform your presentation images from amateur to professional in seconds?
Ready to upgrade your product photos? Try SellerCam's AI camera →
By following the steps in this guide, you can ensure that your next Google Slides presentation is clean, focused, and visually stunning. Whether you stick with the built-in Google tools or upgrade to a dedicated AI solution like SellerCam, your slides will thank you.
Author

Categories
More Posts

Mastering Background Removal for Product Images: The Ultimate Seller's Guide
Learn how to remove backgrounds from product images efficiently. Discover pro techniques using AI, manual tools, and platform-specific requirements to boost sales.

How to Remove Background from Image in Google Slides: The Ultimate Professional Guide
Master background removal in Google Slides using built-in AI tools, third-party add-ons, and professional AI cameras to create stunning presentations.

Mastering Amazon Product Image Editing: The Ultimate Guide to High-Conversion Visuals
Learn the essential techniques for Amazon product image editing. From technical compliance to AI-powered background removal, discover how to boost your sales with professional visuals.
Newsletter
Join the community
Subscribe to our newsletter for the latest news and updates