
The Ultimate Guide to Clothing Photography: Mastering the Ghost Mannequin Effect
Learn how to achieve the professional ghost mannequin effect for your clothing brand. A deep dive into photography techniques, post-processing, and AI tools.
When you browse high-end fashion retailers like Nordstrom or ASOS, you’ll notice a consistent, polished look: clothes that appear to be worn by an invisible person. This isn't magic; it's the "Ghost Mannequin" effect, also known as the invisible mannequin or hollow man technique.
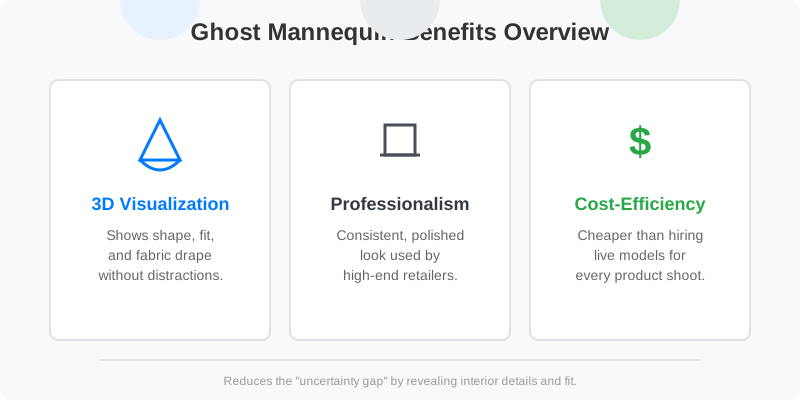
For e-commerce sellers, this method is the gold standard. It provides the shape and fit of a live model while keeping the focus entirely on the garment. Unlike flat lays, which can look lifeless, or model shots, which can be expensive and distracting, the ghost mannequin effect offers a 3D perspective that helps customers visualize how the fabric drapes and fits.
Why Ghost Mannequin Photography Matters for E-commerce
The primary goal of product photography is to reduce the "uncertainty gap" for the buyer. When a customer looks at a t-shirt or a blazer, they want to know two things: What does it look like on a body? And what does the inside (the lining, the tag, the stitching) look like?
The ghost mannequin effect solves both. By removing the mannequin in post-production, you create a hollowed-out view that reveals the interior details of the neck and hemline, which are usually obscured. This transparency builds trust, as customers can inspect the quality of the interior construction—a key indicator of premium apparel.
Comparing Photography Styles
Before diving into the "how-to," let's compare the three most common ways to shoot apparel. Each has its place, but the ghost mannequin offers a unique balance of professional aesthetics and scalability.
| Feature | Flat Lay Photography | Live Model Photography | Ghost Mannequin |
|---|---|---|---|
| Visual Appeal | Minimalist/Clean | High/Emotional | Professional/Structural |
| Cost | Low | Very High | Moderate |
| Setup Time | Fast | Slow (Coordination) | Moderate |
| Customer Insight | Poor (No fit info) | Excellent | High (Shows 3D shape) |
| Consistency | High | Low (Model poses vary) | Very High |
The Traditional Ghost Mannequin Workflow
Historically, achieving this look required a multi-step process involving physical mannequins with removable parts and hours of Photoshop work. This process is meticulous and demands a high level of technical skill in both photography and digital manipulation.
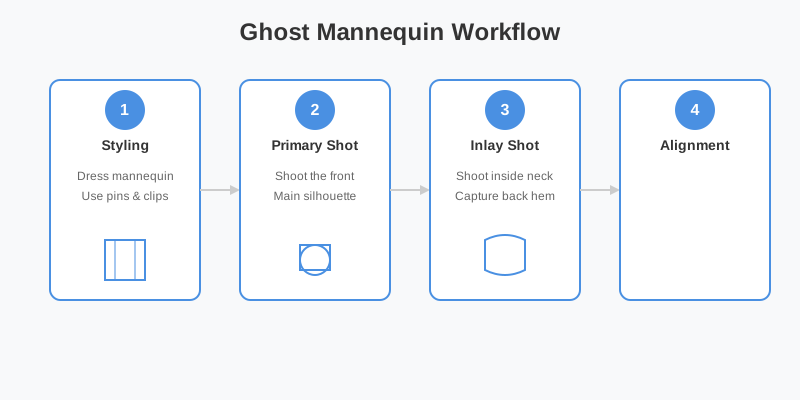
1. The Setup: Choosing the Right Form
You need a mannequin that fits the size of your clothing perfectly. If the mannequin is too large, it will stretch the fabric; if it's too small, the clothes will look baggy and unappealing. Ideally, use a "modular" or "invisible" mannequin. these are specialized forms where the chest, neck, or arms can be removed in sections so the camera can "see" the inside of the garment without the plastic structure getting in the way.
2. The Multi-Shot Process: Capturing the Data
To create a true ghost effect, you cannot rely on a single image. You usually need at least two primary photos:
- The Body Shot: The garment worn on the mannequin. This captures the overall shape, the drape of the sleeves, and the fit around the torso.
- The Inlay Shot: This is the "secret sauce." You take the garment off the mannequin and photograph the inside-back of the neck or the interior lining of a jacket. This is often done by pinning the garment to a foam board or using a specialized "neck insert" tool.

3. Post-Production (The Hard Part)
In Photoshop, you would stack these images as layers. You'd use the Pen Tool to create precise clipping paths to mask out the mannequin. Then, you "stitch" the neck area from the inlay shot into the body shot. This requires advanced masking skills, as you must match the lighting and grain of both photos perfectly to make the transition look seamless.
| Post-Processing Step | Estimated Time (Manual) | Difficulty Level |
|---|---|---|
| Background Removal | 5-10 Minutes | Medium |
| Pathing/Masking | 15 Minutes | High |
| Shadow Creation | 5 Minutes | Medium |
| Color Correction | 3 Minutes | Low |
| Total per Image | ~30 Minutes | Expert Required |
Advanced Techniques for Different Apparel Types
Not all clothing is created equal. The ghost mannequin technique varies significantly depending on the item:
T-Shirts and Tops
These are the easiest to shoot. Focus on the "neck hole." Ensure the shoulders are symmetrical. If the t-shirt has a V-neck, the inlay shot is critical to show the back brand tag and the stitching of the collar.
Jackets and Blazers
Outerwear is more complex because of the structure. You need to show the "hollow" nature of the sleeves. Use a mannequin with removable arms to capture the inside of the cuff. For the lapels, ensure they are pinned symmetrically to maintain a sharp, professional silhouette.
Jeans and Trousers
For pants, the ghost mannequin effect helps show the rise and the waistband. Use a "lower body" mannequin. To get the 3D effect at the waist, you may need to stuff the waistband with tissue paper or use a specialized clip to keep the "mouth" of the pants open during the shot.
How AI is Revolutionizing Clothing Photography
The manual workflow described above is why many small brands shy away from ghost mannequin photography—it’s simply too expensive or time-consuming. However, AI-powered tools like SellerCam are changing the landscape.
Instead of needing a modular mannequin and expert Photoshop skills, AI can now recognize the contours of a garment and intelligently synthesize the "hollow" parts. Modern AI models are trained on millions of apparel images, allowing them to predict what the inside of a collar looks like based on the exterior fabric and lighting.
Pro Tip: Even when using AI, ensure your clothing is steamed and wrinkle-free. AI can fix many things, but natural fabric drape starts with a well-prepped garment. A steamer is the most important tool in your studio.
Step-by-Step Guide to Professional Results
If you want to achieve this look without a $500/day editor, follow this streamlined workflow:
Step 1: Prepare the Garment
Use a steamer to remove every fold. Use clips and pins on the back of the mannequin to tighten the fit and create a tailored look. If the sleeves are drooping, stuff them with tissue paper or use thin wire to give them volume. The goal is to make the garment look like it's being worn by a person with perfect posture.
Step 2: Lighting is Key
Use a three-point lighting setup:
- Key Light: The main light source, placed at a 45-degree angle to the product.
- Fill Light: A softer light on the opposite side to reduce harsh shadows.
- Backlight: Placed behind the mannequin to create a crisp edge and separate the product from the background.
You want to minimize harsh shadows on the garment itself but keep enough soft shadow to define the 3D shape. If the lighting is too flat, the "ghost" will look like a 2D cutout.
Step 3: Capture the Images
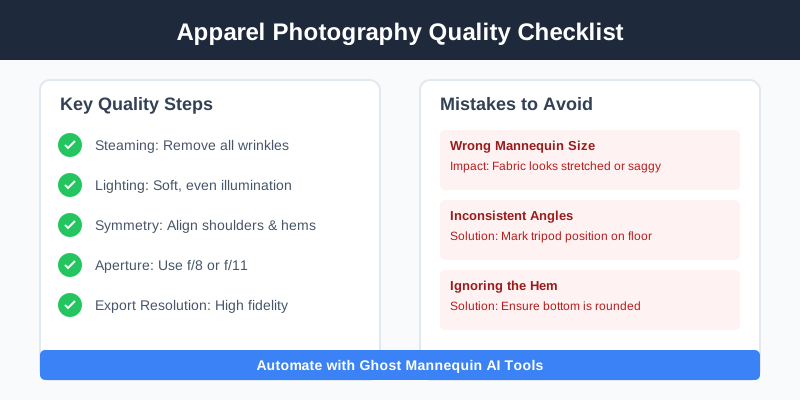
Shoot at a high aperture (f/8 or f/11) to ensure the entire garment—from the front buttons to the back collar—is in focus. Use a tripod to ensure every shot is framed identically. Capture the front, back, and any detail shots like buttons, embroidery, or fabric texture.
Step 4: Automate the "Ghosting"
This is where SellerCam shines. Instead of manual clipping paths:
- Upload your photo to the Ghost Mannequin Effect tool.
- The AI identifies the mannequin and removes it while preserving the garment's edges.
- It automatically generates the internal neck or waistline textures based on the surrounding fabric.
- Apply a "Natural Shadow" filter to give the garment weight and depth on the white background.
Common Mistakes to Avoid
Even with the best tools, certain mistakes can ruin the professional look of your e-commerce store.
| Mistake | Impact | Solution |
|---|---|---|
| Wrong Mannequin Size | Fabric looks stretched or saggy | Use a mannequin slightly smaller than the garment. |
| Inconsistent Angles | Catalog looks messy | Mark your tripod position on the floor with tape. |
| Ignoring the Hem | Looks "flat" at the bottom | Ensure the bottom of the shirt is rounded, not straight. |
| Over-Editing | Garment looks fake or "plastic" | Keep fabric textures visible; don't over-smooth. |
Case Study: The Impact of Ghost Mannequin on Conversion
Consider a mid-sized streetwear brand that transitioned from flat-lay photography to the ghost mannequin effect.
Before (Flat Lay):
- Conversion Rate: 1.2%
- Return Rate (Size/Fit issues): 15%
- Average Time on Page: 45 seconds
After (Ghost Mannequin):
- Conversion Rate: 2.1%
- Return Rate (Size/Fit issues): 9%
- Average Time on Page: 72 seconds
Analysis: The 3D representation allowed customers to better understand the volume of the hoodies and the taper of the joggers. By seeing the "inside" of the hood, they could perceive the fleece quality, leading to higher confidence and fewer returns.
Frequently Asked Questions (FAQ)
Do I need a special "invisible" mannequin?
While "invisible" mannequins (with removable magnetic parts) make the job easier, you can use a standard white mannequin. You will just need to take an extra photo of the inside of the garment and use AI or Photoshop to merge them.
What is the best background for ghost mannequin photography?
Always shoot against a plain, neutral background—white or light grey is best. This makes it much easier for AI tools or editors to distinguish between the garment and the environment.
How do I handle transparent or lace fabrics?
Transparent fabrics are the most difficult. For these, it is often better to use a live model or a very high-end manual retouching service, as AI can sometimes struggle with "seeing through" the first layer of fabric to the mannequin behind it.
Can I do this with a smartphone?
Yes! Modern smartphone cameras are more than capable of capturing the detail needed. The key is the lighting and the stability (use a tripod). Tools like SellerCam are specifically designed to process mobile photos into professional assets.
The ROI of Professional Imagery
Investing in ghost mannequin photography isn't just about "looking pretty." It's a business decision. Brands that switch from flat-lays to ghost mannequin effects often see:
- Lower Return Rates: Customers have a better understanding of the fit.
- Higher Conversion: Professionalism builds trust.
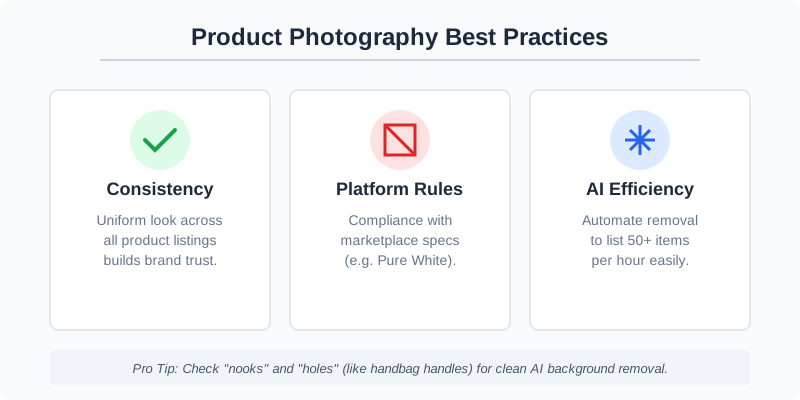
- Platform Compliance: Amazon and Google Shopping have strict requirements for clean, white-background images.
Conclusion: Scaling Your Fashion Brand
Clothing photography doesn't have to be a bottleneck for your business. By combining traditional prep (steaming and pinning) with modern AI tools, you can produce studio-quality ghost mannequin images at a fraction of the traditional cost.
Whether you are selling on Shopify, Amazon, or Instagram, the "hollow man" effect gives your brand an instant upgrade in perceived value. It bridges the gap between the physical and digital shopping experience, giving your customers the visual information they need to click "Add to Cart."
Ready to stop struggling with Photoshop and start selling more? The future of fashion e-commerce is automated, 3D, and ghost-mannequin ready.
Ready to upgrade your product photos? Don't let complicated editing hold your brand back. Try SellerCam's AI camera and ghost mannequin tools today to create stunning, platform-ready images in seconds. Try SellerCam for Free →
Author

Categories
More Posts

The Ultimate Guide to Ecommerce Product Image Editing and Retouching Services
Master the art of ecommerce image editing. Learn how professional retouching services and AI tools like SellerCam can transform your conversion rates.

The Ultimate Guide to Ecommerce Product Image Editing: Scaling Your Visual Strategy
Master ecommerce product image editing with our comprehensive guide. Learn how to optimize visuals, leverage AI automation, and boost conversion rates across all major platforms.
How to Remove Background from Image on PowerPoint: The Complete Guide for Sellers
Master the art of background removal in PowerPoint. Learn step-by-step techniques, compare built-in tools with AI alternatives, and optimize your product photos.
Newsletter
Join the community
Subscribe to our newsletter for the latest news and updates