The Ultimate Guide to Ghost Mannequin Clothing Photography for E-commerce
Master ghost mannequin photography to create professional 3D hollow-man effects for your apparel brand. Learn setup, shooting, and AI editing techniques.
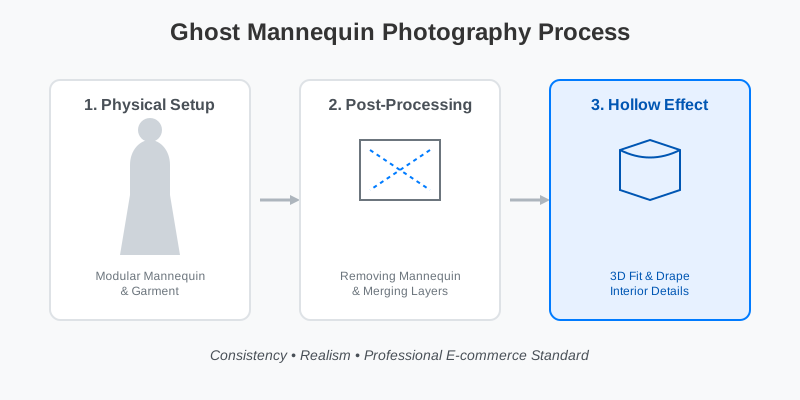
In the hyper-competitive world of online fashion, how you present your clothing can make or break a sale. Flat-lay photography often looks limp and uninspired, while hiring live models for every SKU is a logistical and financial nightmare for growing brands. This is where ghost mannequin photography—also known as the "invisible man" or "hollow man" effect—becomes a game-changer.
By using a modular mannequin and clever post-processing, you can showcase your garments as if they are being worn by an invisible person. This technique provides a three-dimensional view of the fit, drape, and interior details that flat photography simply cannot capture. In this comprehensive guide, we will explore everything from the physical studio setup to the cutting-edge AI tools that are making this professional look accessible to everyone.
Why Ghost Mannequin Photography is the E-commerce Standard
When customers browse platforms like Amazon, Shopify, or Etsy, they are looking for two things: consistency and detail. Ghost mannequin photography delivers both by removing the distraction of a model's features while maintaining the realistic shape of the garment.
The Psychological Impact on Buyers
Research shows that shoppers are more likely to visualize themselves in a garment when it is presented on a neutral, invisible form rather than a specific model. It removes the "this wouldn't look good on me" barrier. Furthermore, it allows you to show the brand label and inner lining of a jacket or shirt, which signals high quality and attention to detail.
| Feature | Flat Lay | Live Model | Ghost Mannequin |
|---|---|---|---|
| Visual Depth | 2D / Flat | 3D / Realistic | 3D / Realistic |
| Cost | Low | High | Medium |
| Consistency | High | Low | Very High |
| Focus | Product Only | Person + Product | Product Only |
| Production Speed | Fast | Slow | Medium |
Essential Equipment for the Perfect Shot
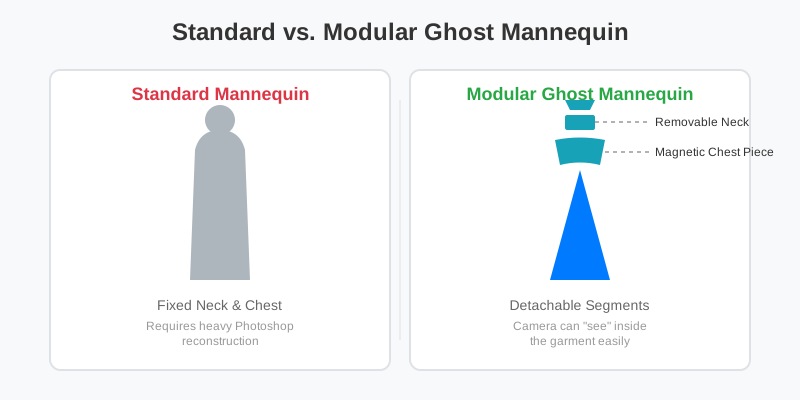
To achieve the ghost mannequin effect, you need more than just a camera. The "ghost" part of the name comes from the fact that we use a mannequin with removable parts—chest pieces, necklines, and arms—to ensure the camera can "see" the inside of the garment.
1. The Modular Mannequin
A standard mannequin won't work easily because you'll spend hours in Photoshop trying to "reconstruct" the back of the neck or the waistline. Professional invisible mannequins come with magnetic, detachable segments.
2. Lighting Setup
You need a three-point lighting system to eliminate harsh shadows that can make the invisible effect look fake.
- Key Light: The primary light source on the product.
- Fill Light: Used to soften shadows created by the key light.
- Backlight/Rim Light: Separates the garment from the background, making the eventual background removal much cleaner.
3. High-Resolution Camera
While a smartphone can work with the right AI tools, a DSLR or Mirrorless camera with a 50mm to 85mm lens is preferred to avoid lens distortion, which can make clothes look wider or shorter than they actually are.
Step-by-Step Workflow: Shooting for the Invisible Effect
The secret to a perfect ghost mannequin image isn't just in the editing; it's in how you take the photos. You actually need two (or sometimes three) specific shots to create a single final image.
Step 1: Shooting the Front
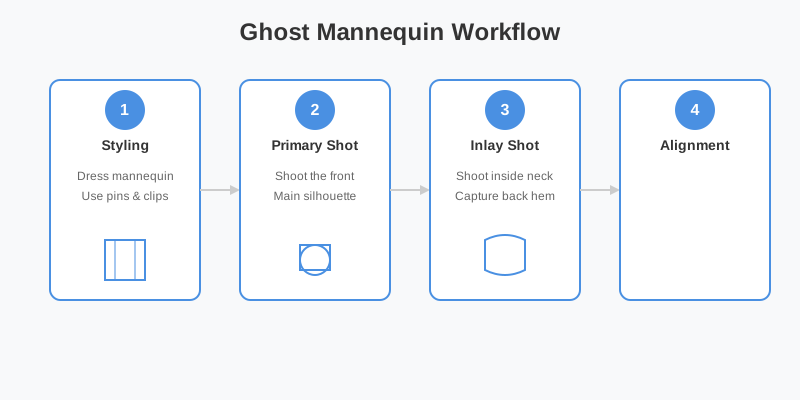
Dress the mannequin and ensure the fit is perfect. Use clips and pins on the back (the side not facing the camera) to tighten the fabric and emphasize the silhouette. Take the main shot.
Step 2: Shooting the "Insert" or "Inlay"
This is the part most beginners miss. After taking the front shot, remove the garment and hang it on a foam board or a different part of the mannequin to photograph the inside of the neck or the back hem. This "inlay" shot will be layered behind the front shot during editing.
Step 3: Consistency Checks
Ensure your camera height and lighting remain identical between the two shots. If the lighting shift between the front and the inlay is too drastic, the final composite will look unnatural.
| Step | Action | Goal |
|---|---|---|
| 1. Styling | Use pins, clips, and tissue paper | Create a perfect, wrinkle-free fit |
| 2. Primary Shot | Shoot the front of the garment | Capture the main shape and texture |
| 3. Inlay Shot | Shoot the inside neck/back | Capture details hidden by the mannequin |
| 4. Alignment | Match focal length and height | Ensure the two shots overlay perfectly |
The Evolution of Editing: From Manual Clipping to AI
Traditionally, creating a ghost mannequin effect required a high-level Photoshop expert. They would use the Pen Tool to create "Clipping Paths," painstakingly cutting out the mannequin and then "stitching" the neck inlay into the main photo. This process could take 20-30 minutes per image.
The Manual Process vs. AI Automation
Today, AI tools like SellerCam are revolutionizing this workflow. Instead of manual stitching, AI can recognize the structure of the garment and the mannequin, automating the background removal and even helping to enhance the 3D depth of the fabric.
The "Before" image above shows the garment on a standard mannequin with visible supports. The "After" image, processed through SellerCam's AI, shows a clean, professional 3D effect that is ready for any major e-commerce platform.
Platform Requirements for Apparel Photography
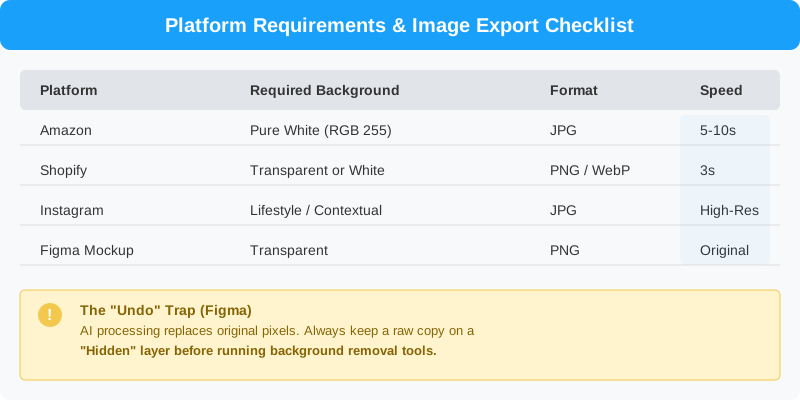
Different marketplaces have different standards for how ghost mannequin images should be presented. Ignoring these can lead to suppressed listings.
| Platform | Background Color | Padding/Margin | File Format |
|---|---|---|---|
| Amazon | Pure White (255,255,255) | 85% of frame occupied | JPG / WebP |
| Shopify | Transparent or White | Consistent across all items | PNG / WebP |
| Etsy | Neutral / Lifestyle | Varies | JPG |
| Any | 4:5 or 1:1 ratio | JPG |
Pro Tips for High-Quality Results
- Steam Everything: Wrinkles are magnified in ghost mannequin photography. Use a professional steamer before the garment touches the mannequin.
- Use the Right Size: Don't put a Small shirt on a Large mannequin. It will stretch the fabric and look distorted. If the mannequin is too small, use clips to pull the fabric tight.
- Focus on the Shoulders: The "ghost" effect lives and dies by the shoulder line. If the shoulders look slumped, the "invisible person" looks like they have poor posture, which makes the clothes look cheap.
- Symmetry is Key: Ensure sleeves are at the same height and the buttons are perfectly centered.
How SellerCam Simplifies the Process
For many small to mid-sized brands, the cost of professional ghost mannequin editing (which can range from $2 to $10 per image) is a significant barrier. SellerCam's AI-powered camera and background removal tools are designed to bridge this gap.
By using the SellerCam AI Background Removal and Product Photo Enhancement tools, you can:
- Instantly remove the mannequin and studio background.
- Apply a consistent pure white background that meets Amazon's strict requirements.
- Enhance the textures and colors of the fabric to make them pop.
- Use the mobile-friendly interface to shoot and process directly from your warehouse or studio.
Ready to transform your clothing photography without the Photoshop headache? Try SellerCam's AI camera today and see the difference a professional ghost mannequin effect can make for your conversion rates.

Conclusion
Ghost mannequin photography is no longer a luxury reserved for high-end fashion houses. It is a functional, high-converting necessity for any serious apparel seller. By understanding the balance between physical styling and digital enhancement, you can create a storefront that looks professional, trustworthy, and ready for the global market. Whether you are shooting your first collection or scaling an established brand, focusing on the "invisible man" effect will ensure your products—not the distractions—are the star of the show.
作者

分类
更多文章
AI 如何革新内容创作:从缩略图到演示视频
2025 年,AI 不仅撰写文本——它正在生成整个视觉工作流。深入了解 Veo 3、Runway Gen-4 和 Kling 等工具如何为创作者和营销人员带来革命性改变。

The Ultimate Guide to Best Software to Remove Background from Image for E-commerce
Discover the best software to remove background from images. Compare AI tools, professional software, and batch processors to streamline your e-commerce workflow.

How to Remove Background from Image on Slides: The Ultimate Guide for Professional Presentations
Master the art of removing backgrounds from images in Google Slides and PowerPoint. Learn professional techniques, compare tools, and discover how AI simplifies the process.
邮件列表
加入我们的社区
订阅邮件列表,及时获取最新消息和更新