The Ultimate Guide to Invisible Ghost Mannequin Photography for E-commerce
Master the ghost mannequin effect to create professional, 3D hollow man clothing images that boost sales and reduce returns for your fashion brand.
When you browse high-end fashion sites like Net-a-Porter or ASOS, you’ll notice a consistent, polished look for their apparel listings. The clothes look as if they are being worn by an invisible person, maintaining their shape and structure without the distraction of a physical mannequin or a human model. This is the "invisible mannequin" or "ghost mannequin" effect.
For e-commerce sellers, this technique is the gold standard. It provides a clean, professional aesthetic that allows customers to focus entirely on the garment's fit and fabric. In this guide, we will dive deep into the technicalities of ghost mannequin photography, the post-production workflow, and how AI is revolutionizing this once-tedious process.
Why Ghost Mannequin Photography is Essential
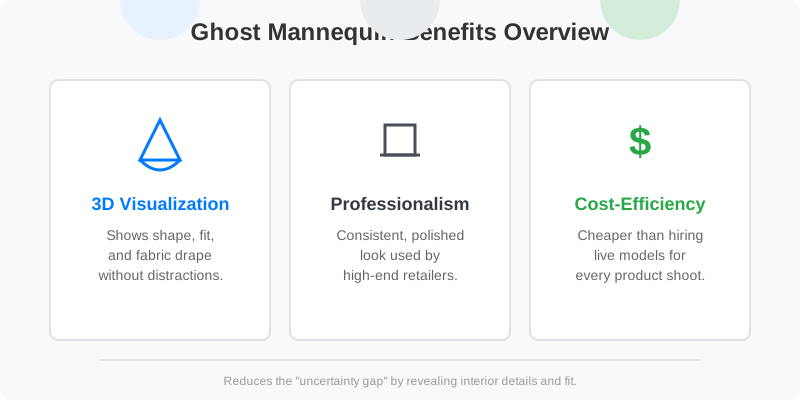
In the competitive world of online fashion, presentation is everything. While flat-lay photography is easy to produce, it fails to show how a garment drapes or fits a human body. On the other hand, hiring professional models for every SKU is prohibitively expensive for most growing brands.
The ghost mannequin effect bridges this gap. It provides the 3D volume of a model with the cost-efficiency of studio photography.
The Impact on Customer Psychology
When a customer sees a shirt with the ghost mannequin effect, they can mentally "step into" the garment. Research shows that removing the model's face and personality allows the shopper to better visualize themselves wearing the item. Furthermore, it highlights internal details—like the brand label or the lining of a blazer—that are usually hidden when a model wears the piece.
| Feature | Flat Lay | Live Model | Ghost Mannequin |
|---|---|---|---|
| Visual Depth | 2D / Flat | 3D / Realistic | 3D / Realistic |
| Production Cost | Low | Very High | Moderate |
| Consistency | High | Low (Model poses vary) | Very High |
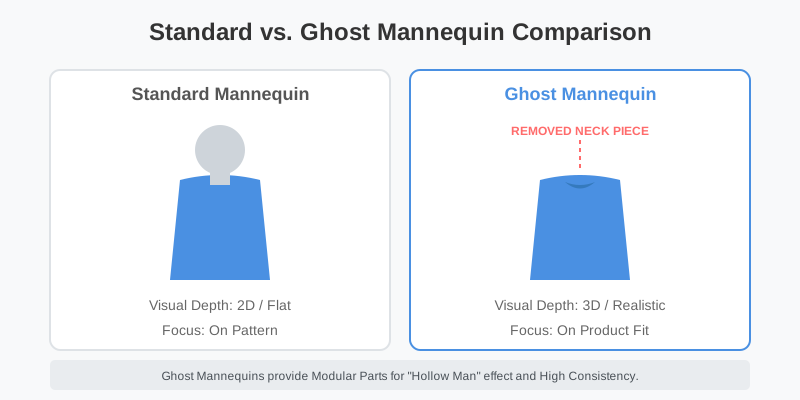
| Focus | On Pattern | On Lifestyle/Model | On Product Fit |
Technical Requirements for the Perfect Shot
Achieving a convincing "hollow man" look requires more than just a camera. You need a specific setup to ensure the post-production phase goes smoothly.
1. The Modular Mannequin
Standard mannequins won't work. You need a "ghost" or "invisible" mannequin. These are modular, meaning you can remove parts of the neck, chest, and arms. If you are shooting a V-neck sweater, you remove the neck piece so the camera can see the inside back of the garment.
2. Lighting and Consistency
Lighting is the most critical element. You want soft, even lighting that eliminates harsh shadows inside the collar or sleeves. A three-point lighting setup is usually recommended:
- Key Light: Provides the primary illumination. Position this at a 45-degree angle to the product.
- Fill Light: Softens the shadows created by the key light. Place this on the opposite side at a lower intensity.
- Back Light: Separates the garment from the background, making it easier to "cut out" later. This is essential for dark clothing on dark backgrounds.
3. Camera Settings for Apparel
To capture the texture of the fabric accurately, use a tripod and the following settings:
- Aperture: f/8 to f/11 for a deep depth of field, ensuring the front and back of the garment are both in focus.
- ISO: Keep it as low as possible (ISO 100 or 200) to avoid digital noise.
- Shutter Speed: Since you are using a tripod, you can go slower, but typically 1/125 or faster is used with studio strobes.
Step-by-Step Workflow: The Traditional Method
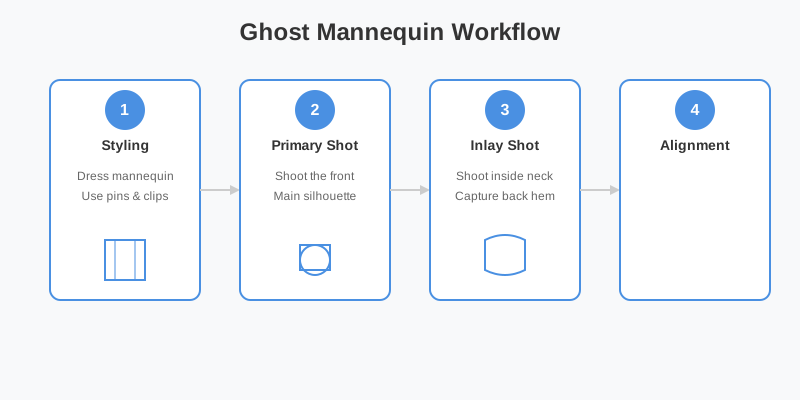
Traditionally, the ghost mannequin effect is a two-part process: the "Standard Shot" and the "Inlay Shot."
The Standard Shot
You dress the mannequin in the garment. Use clips and pins at the back to ensure the front fits perfectly. The goal here is to capture the overall shape, texture, and drape. Make sure the sleeves are positioned naturally—not sticking straight out, but slightly angled as if resting on a torso.
The Inlay Shot
After the main photo, you take the garment off and photograph the inside details—usually the back of the neck or the waistline. These "inlays" are what you will digitally stitch into the standard shot to create the illusion of transparency. For the best results, hang the garment on a foam board or use a flat surface to keep the collar open and visible.
| Step | Action | Objective |
|---|---|---|
| 1. Prep | Steam the garment | Remove wrinkles that AI or editors struggle with |
| 2. Style | Clip the back | Create a fitted, flattering silhouette on the front |
| 3. Shoot | Capture Front & Back | Get the primary structural images |
| 4. Detail | Shoot the "Inlay" | Capture the inside neck/tags for the hollow effect |
| 5. Edit | Compositing | Merge shots in Photoshop to remove the mannequin |
Advanced Styling Techniques for Different Apparel Types
Not all clothing is created equal. Different items require specific styling tricks to look their best in a ghost mannequin setup.
1. Shirts and Blouses
For button-down shirts, ensure the buttons are aligned perfectly. If the collar looks limp, use collar stays or small pieces of cardboard inside to give it a crisp, professional structure. For the "invisible" effect, unbutton the top one or two buttons to show the interior brand tag.
2. Jackets and Blazers
Blazers are the most difficult to shoot. You must ensure the shoulders are padded correctly on the mannequin. Use tissue paper or bubble wrap to fill out the sleeves if they look too flat. The "inlay" shot for a blazer often requires capturing the lining and the inner pockets to convey high quality.
3. Trousers and Jeans
When shooting pants, you often only need the bottom half of the mannequin. Use pins to create a slight "break" at the hem where the pants would hit a shoe. This adds a level of realism that flat-lay photography simply cannot match.
4. Dresses and Skirts
Flowing fabrics can be tricky. Use a small fan to create a very slight movement, or use fishing line to pull the hem of the skirt out slightly to show the "swing" and volume of the fabric.
The Evolution: AI-Powered Ghost Mannequin Effects
For years, this process was reserved for those with high-end Photoshop skills. It involved tedious pen-tool masking and complex layering. However, AI tools like SellerCam are changing the game.
With SellerCam's AI, the need for complex "inlay" shots is diminishing. Our AI models are trained on thousands of garment structures, allowing them to intelligently "fill in" the missing parts of a garment once the mannequin is removed. This reduces the time spent in the studio by up to 50%.
How AI Streamlines the Process
- Automatic Masking: No more manual selecting of edges. The AI identifies the fabric versus the plastic of the mannequin instantly, even with complex textures like lace or fur.
- Symmetry Correction: AI can subtly adjust the symmetry of a garment, ensuring the sleeves look identical in volume and the hemline is perfectly horizontal.
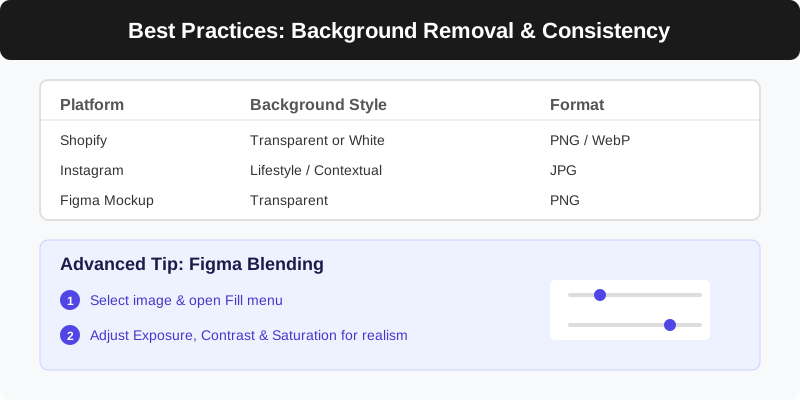
- Background Standardization: Instantly place your "hollow" garment on a pure white background (RGB 255, 255, 255) to meet Amazon and Shopify requirements.
- Shadow Generation: AI can add a subtle "ground shadow" or "drop shadow" to the garment, preventing it from looking like it's floating awkwardly in space.
Platform Requirements for Apparel Images
Different marketplaces have different rules. If you are using the ghost mannequin technique, you must ensure your final output matches these specifications.
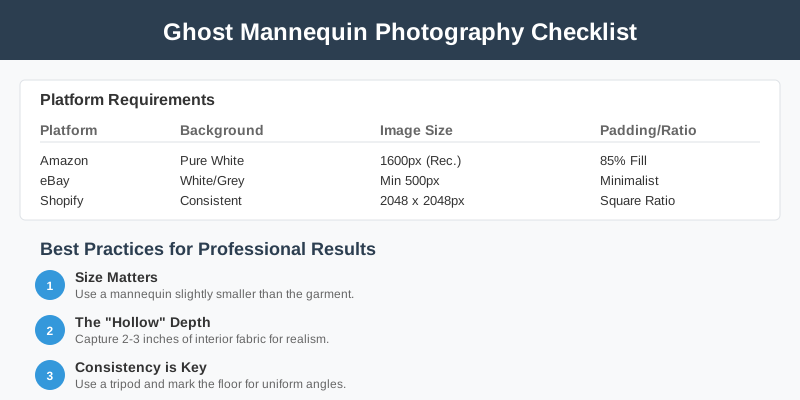
| Platform | Background | Image Size | Padding |
|---|---|---|---|
| Amazon | Pure White | Min 1000px (1600px recommended) | Product should fill 85% |
| eBay | White to Light Grey | Min 500px | Minimalist focus |
| Shopify | Consistent (Any) | 2048 x 2048 px | Square aspect ratio is best |
| Etsy | Natural/White | 2000px wide | Lifestyle feel preferred |
Frequently Asked Questions (FAQ)
Do I need a full-body ghost mannequin?
Not necessarily. Many studios use "torso-only" mannequins for shirts and jackets, and "leg-only" forms for pants. Modular mannequins that allow you to remove the arms or neck are the most versatile.
Can I use a regular mannequin and edit it out?
Yes, but it is much harder. A regular mannequin has a neck and chest that will cover the back-inside of the garment. You will still need to take a separate "inlay" shot of the collar and spend significant time in Photoshop merging the two.
How do I handle transparent or sheer fabrics?
Sheer fabrics are the ultimate test for ghost mannequin photography. You must use a very clean background and ensure the lighting from behind is soft. AI tools are currently getting better at this, but manual masking is often still required for high-end results.
How much does professional ghost mannequin editing cost?
Outsourcing to an editing house typically costs between $0.50 to $2.00 per image. Using an AI tool like SellerCam can reduce this cost to pennies per image while providing instant turnaround.
Best Practices for Professional Results
To ensure your ghost mannequin images look like they came from a high-end studio, follow these industry secrets:
- Size Matters: Use a mannequin that is slightly smaller than the garment. It is much easier to pin a large shirt to a small mannequin than to stretch a small shirt over a large frame. Stretching ruins the fabric's natural texture.
- The "Hollow" Depth: When shooting the neck inlay, don't just shoot the tag. Capture at least 2-3 inches of the interior fabric to give the "hollow" effect a sense of realistic depth.
- Consistency is Key: Use a tripod and mark the floor with tape. Every garment in your collection should be shot from the same height and angle (usually chest-height) to create a cohesive look on your category pages.
- Steam Everything: Wrinkles are the enemy of professional photography. Even if you use AI, a wrinkled shirt will always look "cheap." Invest in a high-quality industrial steamer.
Common Mistakes to Avoid
- Over-pinning: If you pull the fabric too tight at the back, it creates unnatural tension lines on the front. The garment should look like it's resting on a body, not being strangled by it.
- Mismatched Lighting: If your "inlay" shot has different lighting than your "standard" shot, the composite will look fake. Keep your lights locked in position for both shots.
- Ignoring the Hem: Many photographers focus on the neck but forget the bottom hem or the sleeve cuffs. These also need to look "open" and 3D.
- Wrong Camera Angle: Shooting from too high makes the garment look short and stubby. Shooting from too low makes it look imposing. Aim for the center of the garment.
The Future of Fashion E-commerce Imagery
As we move toward 2026, the line between photography and computer-generated imagery (CGI) is blurring. We are seeing the rise of "Virtual Try-On" where the ghost mannequin image serves as the base layer for an AI to wrap the garment around a customer's specific body measurements.
By mastering ghost mannequin photography now, you are preparing your brand for the future of spatial commerce. High-quality, 3D-looking assets are the foundation for AR (Augmented Reality) shopping experiences.
Conclusion: Elevating Your Brand with SellerCam
Invisible ghost mannequin photography is no longer a luxury reserved for massive fashion houses. By combining traditional styling techniques with modern AI tools, any e-commerce seller can produce world-class imagery.
The transition from a distracting plastic mannequin to a professional "hollow man" effect can significantly impact your conversion rates. It builds trust, shows detail, and positions your brand as a premium player in the market. Customers are more likely to purchase when they can clearly see the quality of the construction, from the stitching on the collar to the lining of the pockets.
Ready to transform your product photos? You don't need a professional editor or hours of Photoshop training. Try SellerCam's AI-powered camera and enhancement tools today to create the perfect ghost mannequin effect in seconds. Our platform handles the heavy lifting of masking, compositing, and background removal, allowing you to focus on what matters most: growing your fashion brand.
Author

Categories
More Posts

The Ultimate Guide to eBay Photo Editing Software: Professional Results Without the Learning Curve
Discover the best eBay photo editing software to boost your sales. Compare AI tools, free editors, and professional suites to meet eBay's image requirements.

The Ultimate Guide to Ecommerce Product Image Editing and Retouching Services
Master the art of ecommerce image editing. Learn how professional retouching services and AI tools like SellerCam can transform your conversion rates.

How to Remove Background Watermark from Image: A Professional Guide for Sellers
Master the art of removing background watermarks and cleaning product images. Learn professional techniques, legal considerations, and AI tools for high-converting photos.
Newsletter
Join the community
Subscribe to our newsletter for the latest news and updates