
Google Slides: How to Remove Background from Image for Professional Presentations
Master background removal in Google Slides with our comprehensive guide. Learn built-in methods, Gemini AI features, and professional alternatives for high-quality product slides.
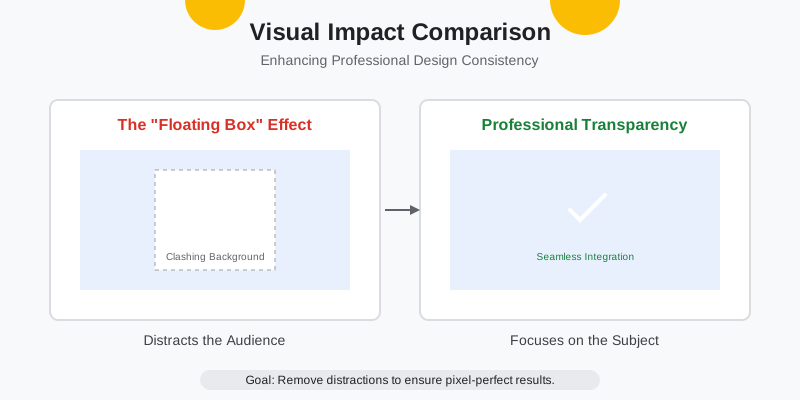
In the world of digital presentations, visual clarity is the bridge between a bored audience and a closed deal. Whether you are a student preparing a thesis or an e-commerce entrepreneur pitching a new product line, the "floating box" effect—where an image carries a clashing white or grey rectangular background—can instantly ruin the professional aesthetic of your slides.
Learning how to remove backgrounds from images in Google Slides is not just about aesthetics; it is about focus. By stripping away distracting surroundings, you allow your audience to concentrate on the subject—be it a sleek gadget, a team member's headshot, or a complex diagram. In this deep dive, we will explore every native method available within the Google ecosystem and introduce professional-grade alternatives like SellerCam for those who need pixel-perfect results.
The Native Approach: Using Google Slides Built-in Tools
Google Slides offers basic image manipulation tools that many users overlook. While it doesn't feature a "Magic Wand" tool like Photoshop, its formatting options allow for significant adjustments that can mimic background removal under the right conditions.
Method 1: The Transparency Adjustment
This is the most common workaround for images that have a solid, uniform background that matches the slide's theme.
- Select your image: Click on the image you've inserted into your slide.
- Open Format Options: Click the "Format options" button in the top toolbar or right-click the image and select it from the menu.
- Adjust Adjustments: Expand the "Adjustments" tab.
- Slide the Transparency: Increase the transparency. Note that this affects the entire image, not just the background.
When to use this: Use this method only when you want to create a watermark effect or if the image is a simple icon where partial transparency doesn't degrade the message. It is generally not recommended for product photography.
Method 2: Masking Images into Shapes
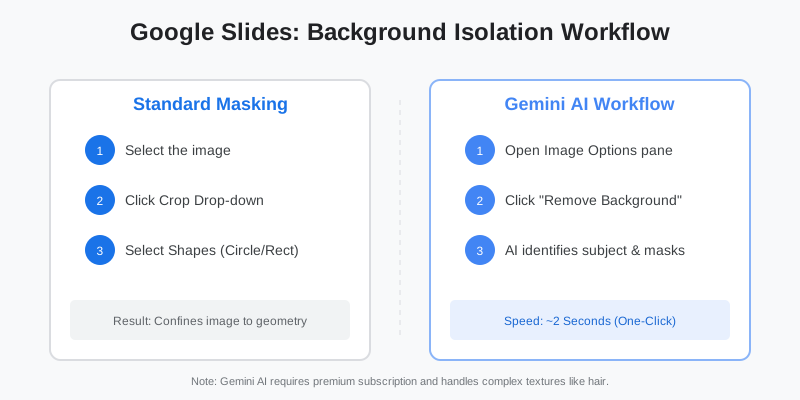
If you cannot remove the background, you can hide it by "masking" the image into a specific shape, such as a circle or a rounded rectangle.
- Select the image.
- Click the drop-down arrow next to the Crop icon in the toolbar.
- Select Shapes and choose a circle or square.
- This "crops" the background out by confining the image to the chosen geometry.
Pro Tip: This is the standard way to handle "Meet the Team" slides. By masking all headshots into identical circles, you create a unified look even if the original photos had different backgrounds.
| Feature | Built-in Adjustments | Professional Background Removers |
|---|---|---|
| Edge Precision | Low (blurry edges) | High (pixel-perfect) |
| Object Isolation | No (affects whole image) | Yes (isolates subject) |
| Complex Patterns | Fails completely | Handles textures/hair |
| Speed | 10 seconds | 2 seconds (AI) |
The AI Revolution: Background Removal with Gemini
Google has recently integrated Gemini AI into Workspace. For users with a Gemini for Google Workspace add-on, background removal has become a one-click reality within the Slides interface.
When you select an image, the "Remove Background" button appears in the Image Options pane. This uses Google's cloud-based vision models to identify the subject and mask the background automatically.
Step-by-Step Gemini Removal:
- Insert Image: Upload your photo to the slide.
- Access Gemini: Click the "Image Options" button.
- One-Click Removal: Look for the "Remove Background" feature (Beta/Gemini users only).
- Refine: If the AI misses a spot, you may need to use the "Reset Image" tool and try a different photo with higher contrast.
However, this feature is currently locked behind a premium subscription and may not always handle complex product edges—like the fine mesh of a chair or the loose strands of a model's hair—with the precision required for high-end e-commerce presentations.
Why Native Tools Often Fall Short for Sellers
If you are using Google Slides to create a product catalog or a wholesale line sheet, "good enough" isn't enough. Standard office tools often struggle with:
- Color Contamination: Light reflecting from a colored background onto the product (e.g., a green tint on a white product shot against a green screen).
- Shadow Preservation: Native tools often delete the natural shadow, making the product look like it's "floating" unnaturally.
- Resolution Loss: Exporting adjusted images from Slides often results in pixelation because Google Slides optimizes for web viewing, not high-fidelity printing.
- Batch Processing: If you have 50 products to add to a deck, doing them one-by-one in Google Slides is a recipe for burnout.
For professional sellers, the goal is a "Ghost Mannequin" or "Studio White" look that meets platform standards like Amazon or Shopify.
| Platform | Background Requirement | Ideal Format |
|---|---|---|
| Amazon | Pure White (255, 255, 255) | TIFF or PNG |
| Shopify | Consistent/Transparent | WebP or PNG |
| Google Slides | Transparent | PNG (Transparent) |
Professional Alternative: SellerCam AI Camera
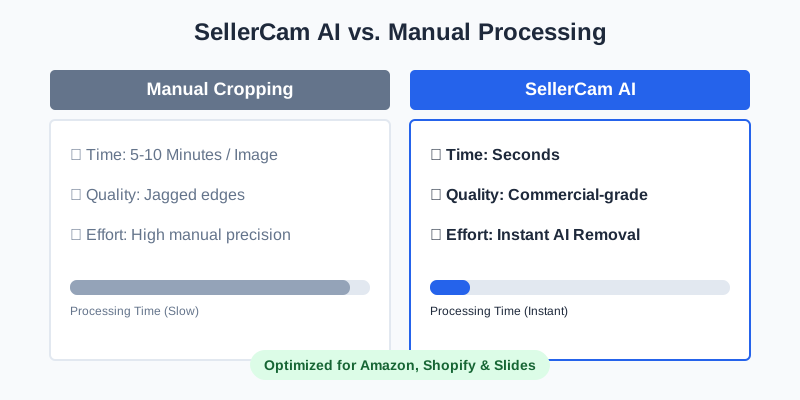
When Google Slides' internal tools fail to provide the crispness your brand deserves, using a dedicated AI tool like SellerCam is the most efficient path. SellerCam allows you to use your browser or phone camera to snap a photo and instantly remove the background with commercial-grade accuracy.
The SellerCam Workflow for Slides
- Capture or Upload: Use the SellerCam web interface to upload your product photo.
- AI Processing: The AI automatically detects the subject and removes the background in seconds.
- Refine: Use the "Product Photo Enhancement" feature to ensure the lighting matches your slide deck.
- Download as PNG: Save the file with transparency.
- Insert into Slides: Drag and drop the high-res PNG into Google Slides.
Why SellerCam is Better for Presentations:
- Edge Intelligence: It distinguishes between the product and the background even with similar colors.
- Shadow Reconstruction: It can add a realistic "grounding" shadow so your product doesn't look like it's flying in space.
- Batch Editing: Process your entire product line in minutes, then import them all at once.
Advanced Tips for Transparent Images in Presentations
Once you have successfully removed the background, how you place the image matters just as much as the removal itself.
1. Match the Lighting
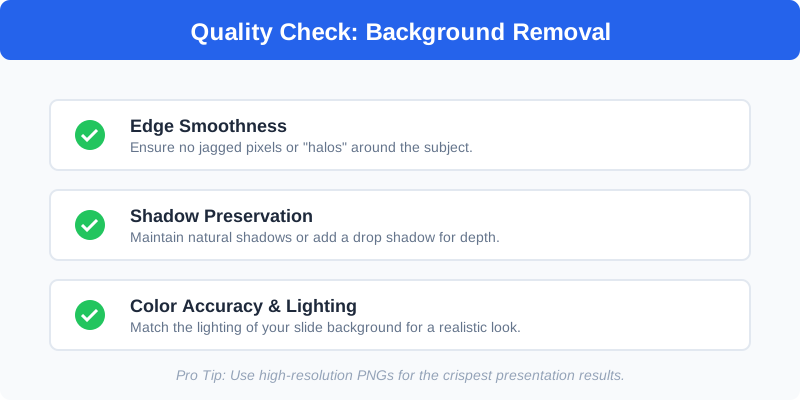
If your slide has a "light source" (implied by the background gradient), ensure your product image lighting matches. If the light in your photo comes from the left, but your slide design suggests light from the top, the image will look "off." SellerCam’s Studio Effect can help normalize lighting across various photos taken at different times.
2. Add a Drop Shadow in Slides
To prevent your subject from looking flat, use the Google Slides formatting tool to add a subtle drop shadow.
- Select the image -> Format Options -> Drop Shadow.
- Angle: Match the angle of other elements on the slide.
- Distance: Keep it low (3-5px) for a "sitting on the page" look.
- Blur Radius: Keep it high (8-10px) and "Transparency" around 50% for a natural, soft look.
3. Layering for Depth (The "Pop-Out" Effect)
Place transparent images behind text or other elements to create a 3D effect.
- The Sandwich Technique: Place a large version of the product (background removed) behind your main text, and a smaller, sharper version in front. This creates an incredible sense of depth that makes your slides look like they were designed by a pro agency.
4. Using the "Replace Image" Feature
If you have already spent time perfectly positioning and animating an image in Google Slides, don't delete it to add the background-removed version.
- Right-click the existing image.
- Select Replace image -> Upload from computer.
- Select your new transparent PNG.
- Google Slides will swap the file while keeping your size, rotation, and animation settings intact.
Comparison of Methods: Which should you choose?
Choosing the right method depends on your end goal. If you are making a quick internal deck, native tools are fine. If you are presenting to investors or customers, you need an external AI solution.
| Method | Best For | Effort | Quality |
|---|---|---|---|
| Transparency Slider | Quick fixes on white backgrounds | Very Low | Low |
| Shape Masking | Headshots or icons | Low | Medium |
| Google Gemini AI | General office use | Medium | High |
| SellerCam AI | E-commerce & Professional Sales | Low | Ultra-High |
Common Troubleshooting Issues
"My image still has a white border!" This usually happens when using basic removal tools that don't support "Anti-aliasing." This "halo" effect is common with low-end free tools. To fix this, use a tool like SellerCam that smooths the transition pixels between the subject and the transparency.
"The image looks blurry after I remove the background." Google Slides compresses images to keep the file size small. If you remove the background using a tool that also lowers the resolution, the final result will be pixelated. Always upload the highest resolution possible after processing it through an enhancer.
"I can't find the Gemini features." AI features are currently rolling out to Google Workspace Labs and paid Enterprise accounts. If you don't see the "Remove Background" button, you likely don't have the specific license required. In this case, using an external tool like SellerCam is your best bet.
"The PNG background is black, not transparent!" Some browsers or old operating systems display transparency as black. Don't worry—once you drag the file into Google Slides, the transparency should render correctly. If it doesn't, ensure you saved the file as a PNG and not a JPEG (JPEGs do not support transparency).
Case Study: From Messy to Masterpiece
Imagine a real estate presentation. The agent has a photo of a house with a cluttered driveway and a gray sky.
- Step 1: They use SellerCam to remove the sky and the driveway clutter.
- Step 2: They import the "clean" house into Google Slides.
- Step 3: They place a beautiful sunset gradient background behind the house image in Slides.
- Result: A premium-looking slide that suggests luxury, achieved in under 2 minutes without knowing Photoshop.
Conclusion: Elevating Your Visual Storytelling
Removing the background from an image in Google Slides is more than a technical trick; it is a design philosophy that prioritizes clarity and professionalism. While Google's native tools provide a baseline for simple tasks, the limitations in edge detection and lighting often necessitate a more robust solution.
By following the steps outlined in this guide—whether using the transparency slider for quick fixes or SellerCam for professional-grade product shots—you ensure that your message is never overshadowed by poor design.
For those who value their time and brand image, leveraging AI-powered tools like SellerCam ensures that every image you drop into your presentation is crisp, professional, and ready to convert. Don't let a messy background distract from your message.
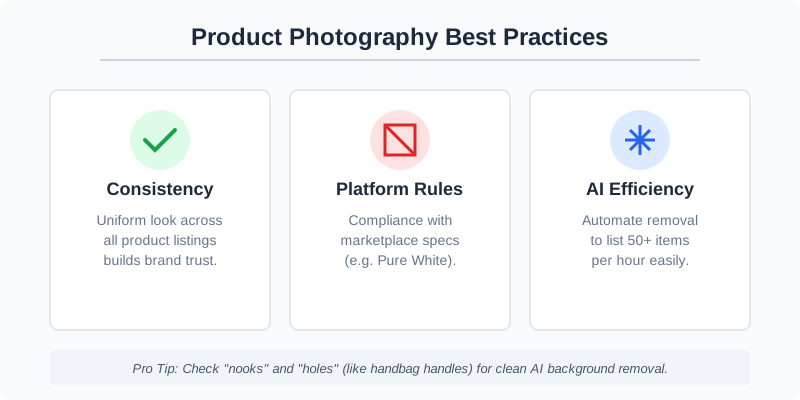
Pro Tip: Always save your processed images in a dedicated folder. If you ever need to move from Google Slides to PowerPoint or Canva, having your "Transparent PNG" library ready will save you hours of re-editing. Creating a "Brand Assets" folder on your Google Drive is the best way to keep these organized.
Frequently Asked Questions (FAQ)
Can I remove the background of a GIF in Google Slides?
No, Google Slides does not support background removal for animated GIFs. You would need to use a specialized GIF editor to create a transparent GIF before importing it.
Is there a shortcut for "Format Options"?
Yes! Select the image and press Alt + Enter (Windows) or Option + Enter (Mac) to quickly toggle the formatting sidebar.
Does removing backgrounds make my file size larger?
Actually, transparent PNGs can sometimes be larger than JPEGs because they store more data per pixel. If your presentation becomes sluggish, consider using a PNG compressor before uploading.
Can I do this on the Google Slides Mobile App?
The mobile app is very limited. While you can view images with removed backgrounds, the "Format Options" and "Masking" tools are much harder to use. It is highly recommended to do your final layout on a desktop.
Ready to transform your presentation visuals? Try SellerCam's AI camera today and see the difference professional background removal makes for your slides.
作者

分类
更多文章
The Ultimate Guide to Amazon Photo Editing Software: High-Converting Images Without the Complexity
Discover the best Amazon photo editing software and AI tools to meet strict image requirements, boost click-through rates, and scale your ecommerce business efficiently.

Remove White Background from Image: The Complete Guide for Product Photography
Learn how to remove white backgrounds from product images like a pro. Discover AI tools, Photoshop techniques, and why perfect edge detection matters for Amazon, Etsy, and Shopify listings.

Best Photo Editing Software for eBay Sellers: From Professional Suites to AI Automations
Discover the best photo editing software for eBay. Compare professional tools, free editors, and AI-powered solutions to boost your sales and meet eBay's image requirements.
邮件列表
加入我们的社区
订阅邮件列表,及时获取最新消息和更新